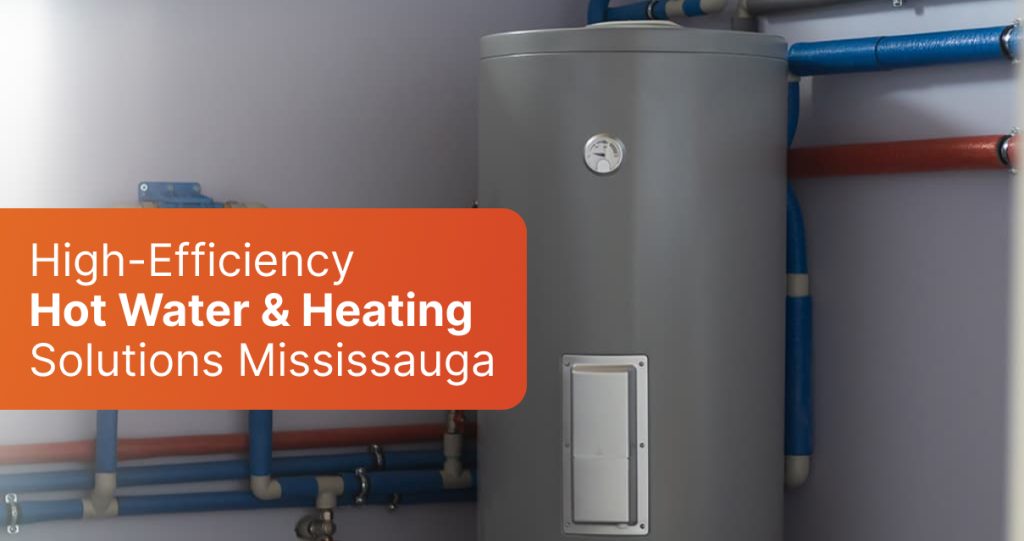
HVAC installation & Plumbing Services in Mississauga & Sentral HVAC Repair

7 Common Plumbing Issues and How to Avoid Them
April 2, 2021
What is Professional Drain Cleaning?
April 16, 2021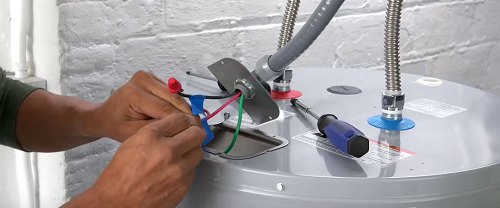
Electric Water Heater Installation: Step-by-Step Guide
If you are a DIY person, then installing of electric heater is not a difficult task. It would help if you worked on the essential electrical and plumbing work. You can install the water heater with a bit of effort. If you are stuck on how to install, then there are easy steps for Water Heater Installation. Electric water heater remains good for about 8 to 10 years. Just because there is a minor fault in the water heater does not means that there is a need for Water Heater Replacement.
There are eleven steps for Hot Water Tank Installation that are listed below.
Disconnect the Electricity
- At the circuit, the breaker panel turns off the electricity to your water heater.
- Make sure that the water heater is not receiving electricity after the breaker turns off. For this purpose, check the wiring of the water heater with a voltage tester.
Drain the Tank
- In this step, drain the tank. To drain the tank, open the hot water faucet and allow the water to flow until it is cold.
- From the top of the tank, shut off the water supply of the water heater.
- Now the drain valve of the water heater connects with a hose. Now open valve drain tank into buckets or floor drain or outside.
- Now you can open the hot water faucet, which you close in step 1. Next, open the faucet and T& P valve. It will allow the air into the tank and will faster the water drain.
Disconnect the Electrical
- In the third step, you should disconnect the electricity and wires of electricity from the water heater top. Ensure that there is no existence of electricity, and you close the breaker from the breaker box. Check the wires with the voltage tester for the existence of electricity.
- Now you should cap the wires off, and you can take the picture to avoid any mistake in the future when you start hooking up your new water heater.
Disconnect the Plumbing
- Now to disconnect the plumbing, disconnect the supply of hot and cold water. Now check your water heater. If there is copper piping, then you need to cut the pipes. Use a pipe cutter for cutting the pipe.
- Now check your T&P discharge pipe. If it is in good repair, then you can use it again for your new water heater.
Remove the Old Water Heater
- Now remove your old water heater when the tank is empty. Use dolly for removing water heater.
- Now adjust your new tank to the exact place. Our recommendation is that set your tank into the drain pan.
- After that, you should check that the supply of electricity reaches the tank. Now check again that you can access drain valves and panels for maintenance.
Prepare the Plumbing Lines
- When the old water heater was cover with copper piping, a Sandpaper cloth is used to prepare the pipe. Then there was a need to cut the pipe for preparing the pipe rube the sandpaper cloth until they shine brightly at the end of pipes.
- Now prepare your pipes for the new water heater.
Connect Electrical Wiring:
- To access wires of electricity, remove the junction box cover.
- Now connect the wires in the same way when you remove them. Now you can get help from the picture you take at the start. And connect the wires in their correct position. Then you should replace the junction box cover.
- With electrical heater attach the electrical.
After attaching the supply lines, turn on the water.
- Connect both cold and hot water supplies to make sure both are in the same inlets.
- If there was copper piping in your old water heater, you should again use the copper piping. Again, use flexible hoses to make connections. It is used for your safety in the condition of earthquakes.
- At the nipples of the water heater, attach the flexible hoses. We recommend that you should use dielectric connectors to attach hoses to the water pipe. It will reduce the corrosion of two different metals.
- Now install your supply lines.
- Now open your tabs to check the leakage of the flexible hose connection. If there is no leakage of water, then you can continue to fill the tank with water.
- When the water tank fulls, then there is the possibility of water flow out of the tap.
Attach the T&P Discharge Pipe
Install the discharge pipe to the T&P valve. It needs to be within 6 inches of the floor at the end of the pipe.
- First 3/4 male copper fitting use.
- In the outside of fitting and inside of valves, paint pipe dope.
- At the T&P valve, fitting attach fitting and tighten.
- At the end of the pipe, you should clean the fitting.
- In the inside of the male fitting and the outside of the pipe paint soldering flux.
- Now attach the pipe to the fitting.
- To connect the pipe, use solder and a torch.
- Electric Water Heater T&P Pipe Installation
Turn On the Power & Bleed the Hot Water Lines
- Turn on the circuit breaker after your water heater fills with water. Make sure your water heater is filled with water. Otherwise, it can contain your elements of heating.
- When you see there is no electric power, then turn off the breaker before checking the connections.
Bleed Hot Water Lines
- Open the water tap for some time to eliminate the air from the tank. Don’t close it until it stops sputtering.
- It takes time for the entire heating of water in the tank.
- You should set a temperature of 120 Fahrenheit.
- Check the pipe when the pipe is dripping. It is a sign of high pressure.
You can get the process of Water Heater Replacement from these steps, and you can replace your water heater by yourself at home. Those were the steps for Electric Water Heater Installation.
